Cross drawing, a technique that involves layering lines in intersecting patterns, is a fundamental yet versatile skill for artists. Whether you’re a beginner looking to learn the ropes or a seasoned illustrator looking to expand your creative cross drawing-drawing can be a powerful way to enhance your artwork’s depth, texture, and detail. This comprehensive guide will explore the various techniques, creative variations, and tips for mastering the art of cross-drawing.
What is Cross Drawing?
At its core, cross drawing (or cross-hatching) is a shading technique in which two or more sets of parallel lines are drawn in different directions, creating the illusion of shading and texture. The lines intersect each other at various angles to build up darker tones, and the density of the lines can control the depth or darkness of the shading. Cross drawing has been widely used throughout art history, especially in printmaking and ink illustrations, to add dimension and visual interest to designs.
History of Cross Drawing
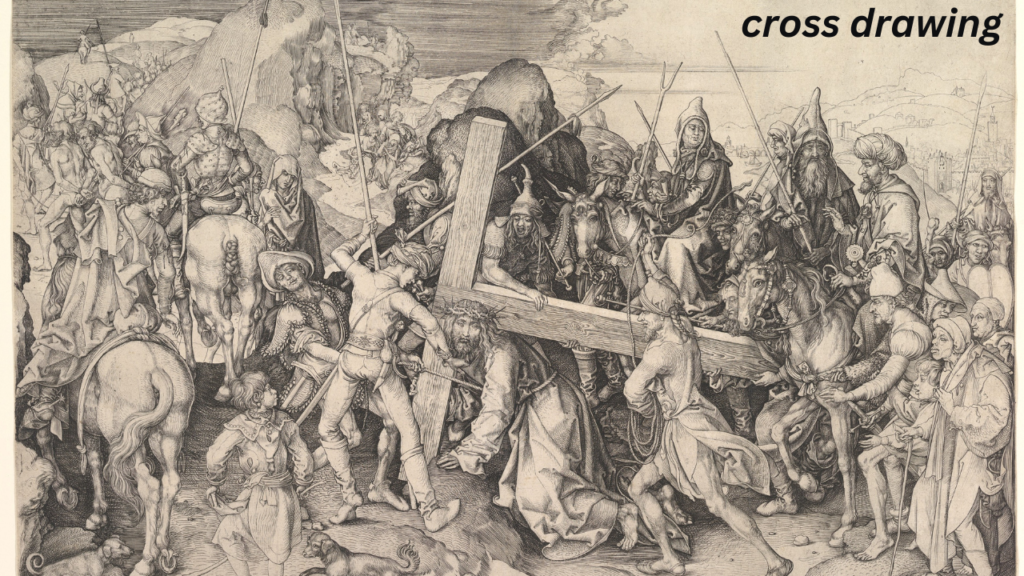
The roots of cross-hatching go back to the Renaissance when master artists like Leonardo da Vinci and Albrecht Dürer used this technique to create incredibly detailed and lifelike drawings. Cross-hatching allowed them to convey light and shadow, making their drawings seem almost three-dimensional. Over time, the technique evolved, gaining popularity through various artistic movements, especially in etching and woodcut printmaking.
In modern times, cross-drawing has become an essential tool for illustrators, graphic novelists, and concept artists. The technique is versatile enough for everything from highly detailed portraits to abstract artwork.
Techniques of Cross-Drawing
The basic principle of cross-drawing is simple: it involves creating layers of intersecting lines to build tone, texture, and depth. However, mastering the technique requires a strong understanding of line direction, pressure, and spacing. Let’s dive into the key strategies you must understand to become proficient in cross-drawing.
Basic Cross-Hatching
Basic cross-hatching is the most fundamental form of cross-drawing. It involves drawing a set of parallel lines in one direction, followed by a second set of lines that cross over the first set at a right angle or any other angle you choose. The more layers of lines you add, the darker and more intense the shading becomes.
How to Practice Basic Cross-Hatching:
- Start by drawing a set of parallel lines vertically.
- Then, draw a second set of parallel lines horizontally, crossing over the first set.
- Continue adding parallel lines at different angles to build up darker areas.
The density of the lines is key to achieving different shades. For lighter areas, use fewer lines with more space in between. For darker areas, increase the density by drawing more lines close together.
Contoured Cross-Hatching
This technique involves adjusting the direction of the cross-hatching to follow the contours of the object you are drawing. Instead of keeping the lines parallel to the page or at right angles, you curve the lines to match the shape and form of the object. This is especially useful when creating the illusion of volume and three-dimensionality in your drawings.
How to Practice Contoured Cross-Hatching:
- Begin by drawing a basic shape, such as a sphere or a cylinder.
- Apply the first set of lines in a direction that follows the shape’s contours, gently curving them along the object’s surface.
- Add a second set of lines that intersect the first at a slight angle, again following the object’s curve.
This technique is ideal for adding realistic depth and highlighting the three-dimensional qualities of your subject.
Parallel Cross-Hatching
In parallel cross-hatching, the sets of lines are kept parallel in the same direction, but they cross each other at different intervals, often forming a grid-like pattern. This cross-hatching style can give your artwork a unique, geometric feel and is frequently used for backgrounds or stylized portraits.
How to Practice Parallel Cross-Hatching:
- Draw a series of parallel lines horizontally or vertically.
- Add a second layer of parallel lines crossing the first at an angle of your choice.
- Ensure the distance between the lines remains consistent to form a uniform grid.
This technique is great for creating a clean, organized texture and for achieving consistent shading or pattern-like effects.
Stippling and Cross-Hatching Combination
Stippling involves applying small dots or points to create tonal values, while cross-hatching uses lines. Combining stippling with cross-hatching can create rich, detailed textures and subtle shading effects that would be difficult to achieve with just one technique.
How to Practice Stippling with Cross-Hatching:
- Start by applying stippling in a defined area to build a base tone.
- Once the stippling is in place, overlay cross-hatching in the same area to add depth and texture.
- Experiment with varying the density of stippling and cross-hatching to create nuanced transitions between light and shadow.
This combination can add texture and variation to your drawing, making it particularly suitable for intricate or highly detailed illustrations.
Broken or Interrupted Cross-Hatching
The cross-hatching lines are intentionally broken or interrupted in this variation, creating a more fragmented, dynamic effect. This approach adds movement to the drawing and is often used for stylized or expressive pieces.
How to Practice Broken Cross-Hatching:
- Begin drawing a set of lines in the direction of your choice.
- Instead of continuous lines, create breaks in the lines at random intervals.
- Add a second set of intersecting lines, again breaking them up sporadically.
The irregularity of this style can lend your artwork an abstract or energetic quality, making it perfect for projects where you want to convey emotion or action.
Creative Variations in Cross-Drawing
While the basic techniques of cross-drawing are the foundation, the creative potential for this art form is vast. Artists can experiment with variations to create unique effects and develop their own style. Here are a few innovative variations of cross-drawing that you can try:
Mixed Media Cross-Drawing
Mixing different media can enhance the depth and texture of your cross-drawings. Combining ink with watercolour, for example, can create stunning contrasts and visual dynamics. The boldness of the ink lines and the softness of the watercolour can bring your cross-hatching to life in unexpected ways.
Colored Cross-Hatching
Cross-drawing doesn’t have to be limited to black and white. Experiment with coloured pencils, markers, or digital tools to create cross-hatching with vibrant hues. This approach is beneficial for graphic design, comic book illustration, or giving your artwork a modern twist.
Textured Cross-Hatching
Incorporate texture by varying the line thickness, creating a more tactile feel in your drawings. For instance, thicker lines might depict rough surfaces, while thinner lines could represent smooth textures. This variation can add a layer of realism or artistic flair.
Abstract Cross-Hatching
Cross-hatching doesn’t always have to serve a realistic purpose. You can use it to create abstract patterns or forms. By manipulating your lines’ angles, density, and direction, you can create complex designs that evoke different emotions or even represent concepts or ideas.
Tips for Improving Your Cross-Drawing Skills
- Practice Regularly: Cross-drawing, like any art technique, requires practice. Start with simple shapes and gradually move to more complex subjects.
- Experiment with Angles: Vary the angles at which you cross your lines to achieve different textures and effects.
- Control Line Density: Pay close attention to the spacing and density of your lines. More densely packed lines create darker shades, while more spaced-out lines produce lighter tones.
- Use the Right Tools: Invest in good-quality pens, pencils, or brushes. Fine-tipped pens are ideal for precision, while softer pencils are better for creating a smooth, gradient effect in shading.
Conclusion
The art of cross-drawing is an essential skill for any artist interested in exploring shading, texture, and depth in their work. By mastering various techniques such as basic cross-hatching, contoured cross-hatching, and parallel cross-hatching, you can take your artwork to the next level. With creative variations and plenty of practice, cross-drawing can be a fun and rewarding way to express your artistic vision.
FAQs
What is the difference between cross-hatching and regular hatching?
Cross-hatching involves layering two or more sets of parallel lines in different directions, while regular hatching uses just one set of parallel lines. Cross-hatching allows for more variation in shading and texture.
How do I create more dynamic shading in cross-drawing?
Vary the density of your lines to create more dynamic shading. Darker areas require more densely packed lines, while lighter areas use fewer lines spaced farther apart. Experiment with different angles and line thicknesses for a unique effect.
Can I use cross-drawing with other art mediums?
Cross-drawing can be combined with various art mediums, such as watercolour, digital painting, or coloured pencils, to create rich, multi-dimensional effects.
Is cross-hatching only for pencil drawings?
Cross-hatching is a versatile technique that can be applied in many mediums, including ink, pen, and even digital tools. It is commonly used in illustration, comics, and fine art.
How do I improve my cross-drawing skills quickly?
To improve quickly, practice regularly and start with basic shapes. Experiment with different techniques and textures, and always focus on controlling the density and direction of your lines for better shading control.
You May Also Read: https://snokido.org.uk/hack-fortnite/